FTP Access is an area of Server management that can sometimes raise questions and cause some confusion among users who are new to it’s processes. This guide will take you through the basics of how to access your server files directly and covers the usage of the Multicraft control panel’s FTP access as well as how to use third party software. In this case we use Filezilla .
Contents
- Using the Multicraft FTP client
- Using an FTP client (Filezilla)
- “Unknown Certificate”
- Further Reading and External Links
- StickyPiston Support
Using the Multicraft FTP client
Logging In
- Open the Multicraft server panel. (This displays the pack logo, player slots, RAM usage and other items)
- Click on
FTP File Accessin the navigation panel on the left.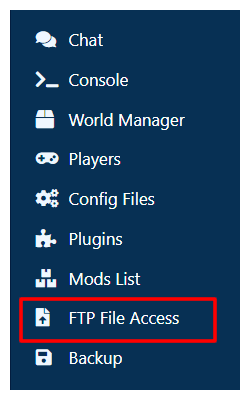
- Enter your Multicraft password and click on the
Loginbutton.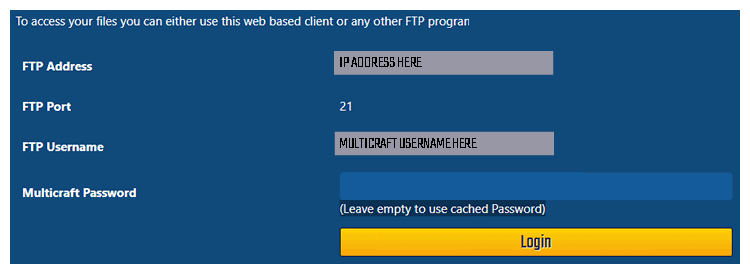
Navigation
Once you are logged into the Multicraft FTP panel you will see a screen like the one pictured below. There are many functions available through the navigation panels.
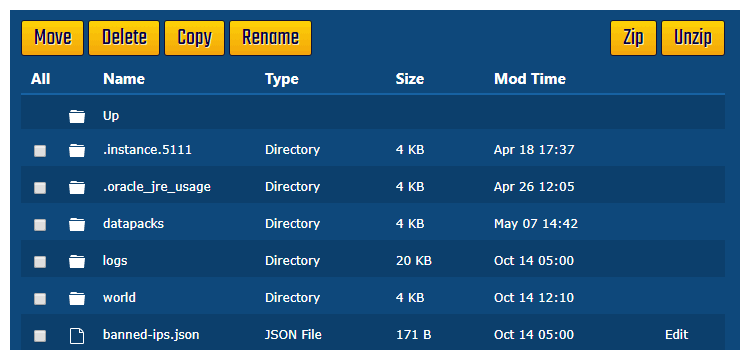
- Click on a directory to view its contents.
- Click on
Upto move up a level within your Minecraft server Files. - Click on the
Name,Type,Size, &Mod Timecolumn headers to sort the directory listing by those attributes. - Click on a file name (The page icon) to download the file.
Modifying files
- Text files can be edited by clicking on the
Editlink in the far right column.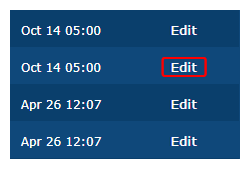
- Select files using the checkboxes in the first column.
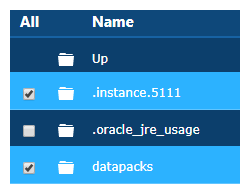
- Click the
Movebutton to move selected files and folders to another folder. - Click the
Deletebutton to remove selected files and folders. - Click the
Copybutton to make a copy of the selected files and folders. - Click on the
Renamebutton to rename selected files and folders.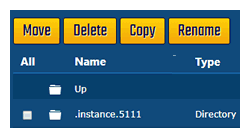
- Use the
Allcolumn header to check or uncheck all the files in the list.
Adding Files and Folders
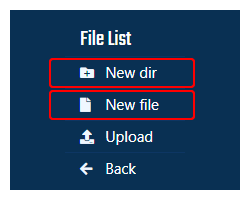
- Click on
New dirto add a new folder to the directory you are currently viewing. - Click on
New fileto add a text file to the directory you are currently viewing.
Uploading Files
- Click on the
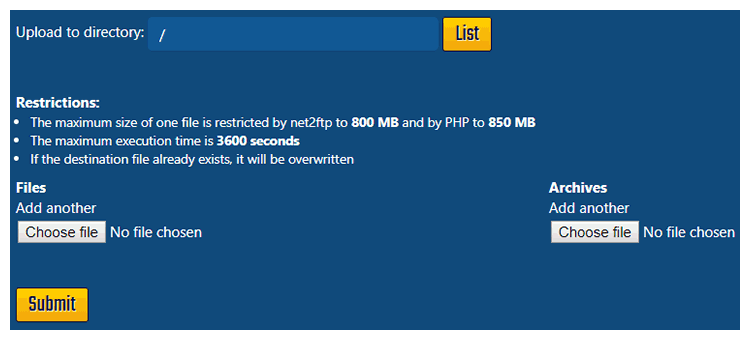
Uploadlink to be taken to the Upload tool.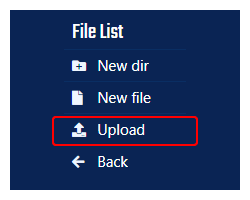
- The new file location will default to the directory you were viewing when you clicked
Upload. Use theListbutton to change it. - To upload a file , click the
Choose Filebutton underFiles. Click theAdd anotherlink to add more than one file. - You can also add archive files (eg. .zip , .rar ) Using the
Choose fileunderArchives. These files will be uploaded and then extracted to the target directory.
This is helpful for plugins or mods with multiple files as well as uploading worlds. - Click on
Submitto initiate the upload.
On some internet browsers you will be able to see the progress of the upload in the lower left hand corner of the window.
Downloading Files
- Find the file(s) you would like to download.
- If you want to download a folder, or multiple files, select all of them with the check boxes on the left of the list.
If you want to download a single file, just click the name of the file in the list and it will start to download. Once it's done downloading, you're done with these steps.
- Once all of the files you want have been selected, press the
Zipbutton at the top of the list.
- Give the archive a name you will recognize, then hit
Submit. - Find the archive you just created in the FTP list, then click the name of the file and your download should start.
Using an FTP client (Filezilla)
There are a few programs available that can provide full FTP access to your server. In this instance we will use Filezilla to showcase the process of connecting and accessing your server files and folders, the process is pretty similar for most FTP clients, finer details (like what menu you need to find) may be different though.
Download Filezilla
Firstly, you will need to download Filezilla here:
Download Filezilla
Remember to read the steps during download as Filezilla is free and may offer other downloads during it's setup. Make sure to tick or untick each offer as you like to avoid any unwanted software downloads.
Log in Using Quickconnect
- Once Filezilla is installed, start the program.
- Enter the
Host,Username,PasswordandPortfor your FTP server into the bar at the top and click theQuickconnectbutton.
All the information needed can be found on the login screen for the Multicraft FTP panel. Hostis the IP address for your server.

Setting up your Server in the Site Manager
There are two ways to add your server to the Filezilla Site Manager.
Use the FileZilla XML Import file:
If you want all the details to be entered into your server manager automatically, follow our guide on how to use the FileZilla XML Import File .
Note: Using this method, you will still need to enter your password into Filezilla. Password is not included in this file for security reasons.
Enter the details manually:
- From the menu choose
File, thenSite Manager....
Alternatively click on the first icon in the toolbar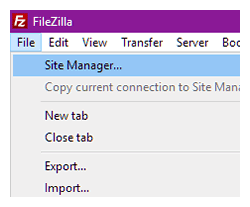
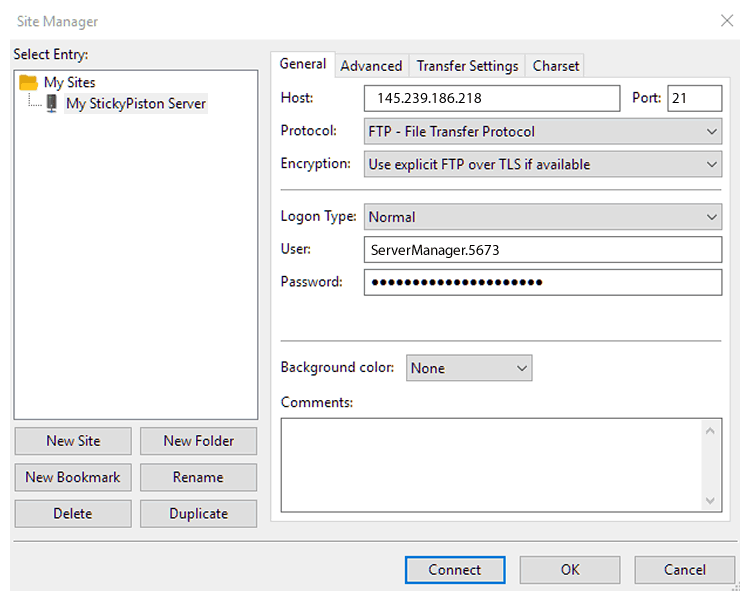
- Click on the
New Sitebutton and rename the entry to something that is obvious what it is, something likeSurvival Minecraft Server. - In the
Generaltab on the right, enter theHostIPandPortvalues. - Change the
Logon TypetoNormaland enter theUsernameandPassword. - Click OK
- To connect, either open the Site Manager and double click the server name on the left hand panel or select the server from the dropdown arrow next to the Site Manager icon on the main toolbar.
Filezilla Basic Functions
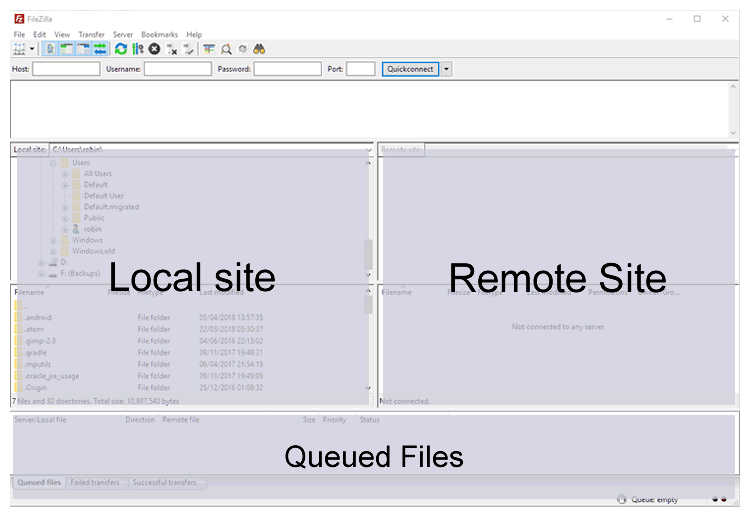
Filezilla is split into a few different panels.
- The panels on the left hand side refer to a
Local siteand these are the files on your home PC. - The panels on the right hand side refer to a
Remote siteand these are the files on your Server. - Any transfers will appear in the bottom panel under
Queued files.
- Double clicking a file on either side will upload/download a copy to the open directory on the other. Alternately, you can drag and drop files between the panels.
- You can also queue files for transfer by right clicking and selecting the
Add Files to Queueoption. - The Queued files can be transferred by:
- Clicking
Transferin the top toolbar and selectingProcess Queuefrom the menu. - Pressing
Ctrl+P, on your keyboard. - Right clicking the Queued files panel and choosing
Process Queue.
- Clicking
- Queued items can be removed by right clicking on them and selecting
Remove Selected.
Getting an Unknown Certificate Alert
Because we use FTPS (A secure connection) your software may raise a warning that states Unknown Certificate .
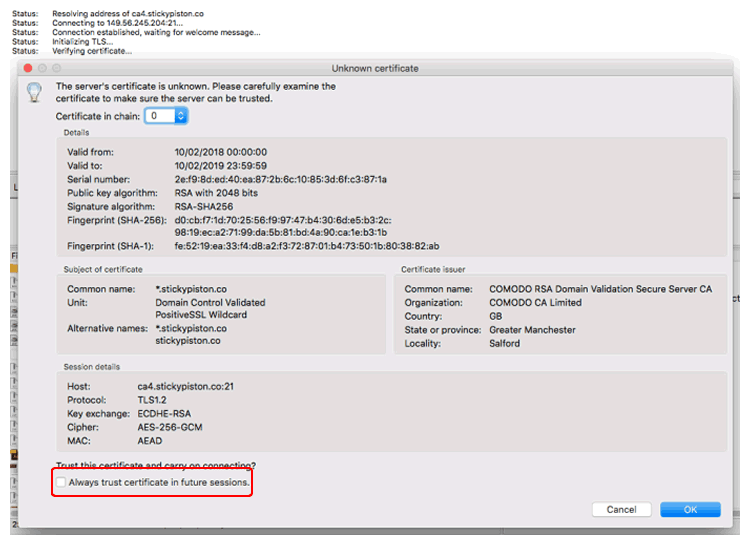
If this happens to you, you can tick the box labelled Always trust certificate in future sessions to prevent you from having to verify it every time. Once the box is ticked, click Ok to proceed with connecting.
Further Reading and External Links
StickyPiston Support
If this guide has not fixed your Minecraft server issues please open a support ticket and our dedicated team will be in touch.
Open Support Ticket
 US Multicraft
 EU Multicraft
 Aus Multicraft