This guide is a step-by-step method for creating a custom modpack with the CurseForge Launcher and getting it running on your StickyPiston server.
Contents
- How to Create a Custom Profile in the CurseForge Launcher
- How to Add Mods to the Custom Profile in the CurseForge Launcher
- Testing Your Modpack
- Creating a Custom Modpack Server
- How to Send Us Your Modpack Files
- What Happens When We Have Your Modpack Files
- Contact Support
- Further Reading & External Links
How to Create a Custom Profile in the CurseForge Launcher
These steps will get you set up with a profile that you can use to experiment with your modpack.
- Open the CurseForge Launcher, if you have not installed the launcher follow this guide.
-
Click on
Minecraft.
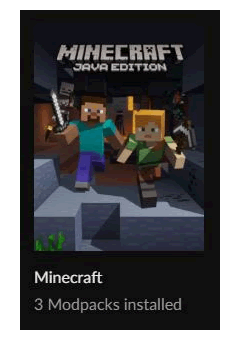
-
Click on
Create Custom Profile.

- Choose a name for your Profile (This can be changed later on).
- Choose a Minecraft version. This is important as the mods you will want to be playing with will need to work with the version you select. So spend some time to make sure you pick the right version for what mods you want.
-
Choose a ModLoader Version (This will always be Forge but you will have to pick which version you need. We recommend the newest version whenever possible).
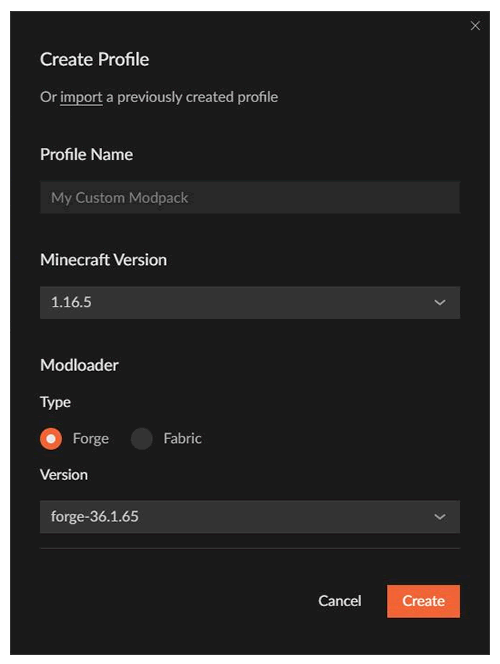
-
Click
Create, this will create the new custom profile
How to Add Mods to the Custom Profile in the CurseForge Launcher
These steps will take you through the process of adding mods to your modpack
-
Click on the image of your newly created custom profile.
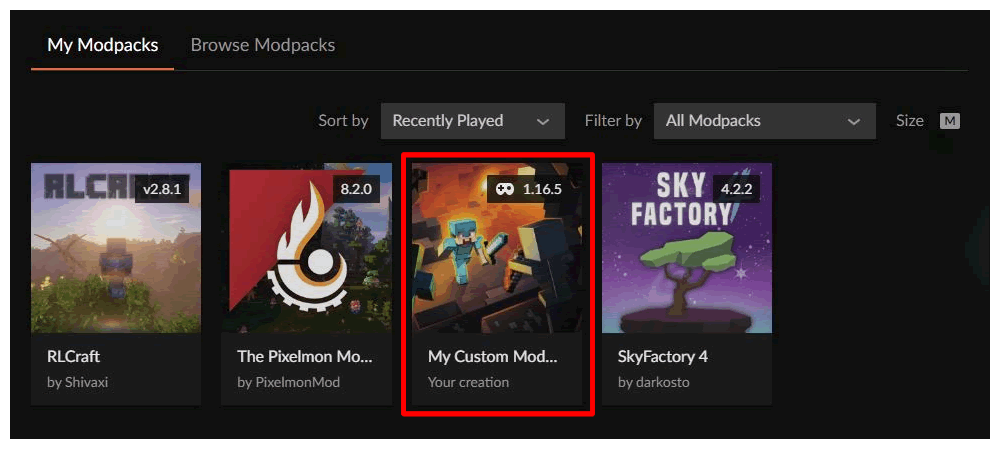
-
If you do not already have any mods installed you will see a small
Get More Contentbutton at the top right of the window.

- This screen will show all available Mods for the version of Minecraft you selected for the profile.
- To see information about a mod, simply click anywhere in the highlighted box when mousing over the mod in the list. You can also search through the mods by using the search box and sort the list to be able to find what you are looking for the fastest.
-
Click on the
Installbutton to add the mod to your pack.
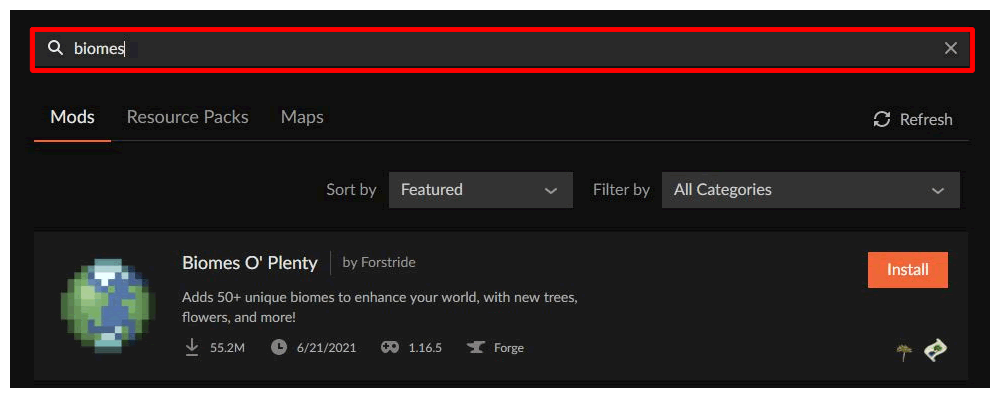
- Repeat this process until you have all the mods you would like added to your pack.
Testing Your Modpack
Before you send your modpack to us, you’ll want to test it’s working on your computer.
-
In the screen with your new profile’s image, click on the purple
Playbutton to get the Minecraft launcher started.

-
When the Minecraft launcher opens, click on the green
Playbutton. - Shortly you should see a loading screen to see the mod loading process.
- Create a singleplayer world to test the mods.
-
If you have installed any world generation mods, make sure to change the
world typewhen you create it.
Creating a Custom Modpack Server
To create a server you will need to export the custom profile and send this to us, we will use this file to create your server for you.
- Click on the Profile image to open the screen that lists all the mods in your pack.
-
Click on the gear icon to the right of the
Get More Contentbutton. -
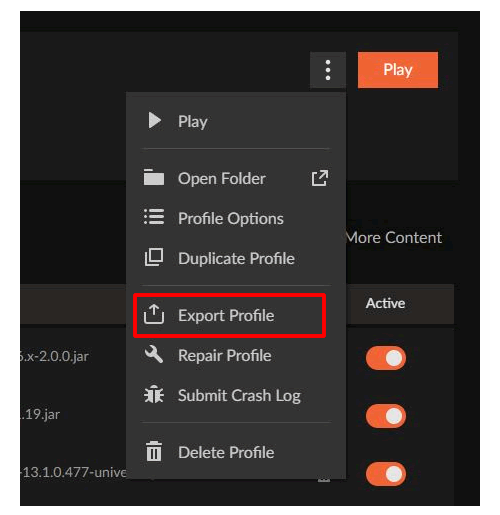
Click on
Share Profile > Export as .zip file.
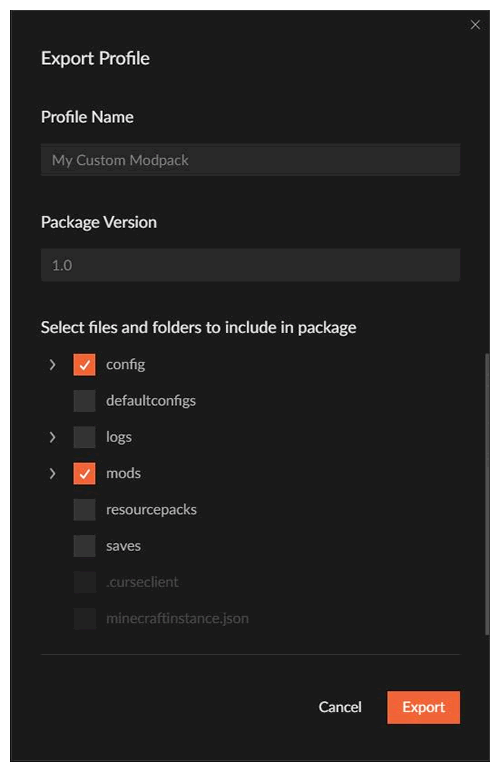
- Name your profile to match the name you have in your CurseForge Launcher.
- The package version does not necessarily matter but it can be used to track updated versions if you continue to make changes to the pack.
-
Select the Files and Folders that are needed. By default the required folders
configandmodsare selected, if you want to include your world save also choosesaves.
-
Click on the purple
Okaybutton.
This will begin the export process and usually the zipped folder can be found in:
C:\Users\<yourname>\Documents\Curse\Minecraft\ExportHow to Send Us Your Modpack Files
To send us your modpack, follow the steps below:
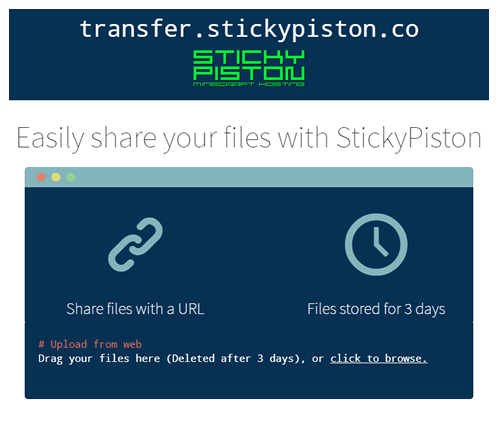
- Go to transfer.stickypiston.co.
- Upload the archive file which was exported in the previous section.
- Copy the link that appears once the file has been uploaded and open a support ticket then we will setup your server from there.
What Happens When We Have Your Modpack Files
Once the custom modpack has been received by StickyPiston we will:
- Install the correct version of Forge on your server.
- Disable any client side mods that won’t work on a server.
- Test that the server starts correctly and all the mods are loaded.
- Debug and fix any errors that appear.
- Reply to your support ticket to let you know that the modpack is installed and running on your server.
Further Reading & External Links
StickyPiston Support
If you use our services or not, we are always happy to help. Open a support ticket and our dedicated team will be in touch.
Open Support Ticket
 US Multicraft
 EU Multicraft
 Aus Multicraft