With the release of Minecraft Caves and Cliffs Part 1, you might want to update your server to 1.17, in this guide we will go through how to update a vanilla Minecraft server to Minecraft 1.17.
Quick Steps
The following steps are for people who are familiar with the Instance Manager and the World Manager, if you are not familiar with either of these, read the Updating Your Server section.
- Take a backup of your world(s), or duplicate them using the world manager
- Stop your server
- Change the JAR of your instance using the Instance Manager
Updating Your Server
STICKY NOTE

Before you begin, take a backup of your world so that it can be recovered in case something goes wrong.
- Log into Multicraft
- Stop your server
-
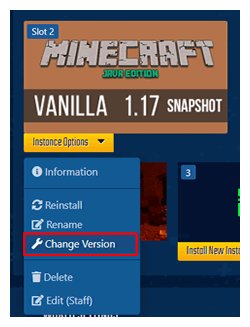
In the instance manager, click
Instance Optionsfor your 1.16.5 instance -
Click
Change Versionin the dropdown

-
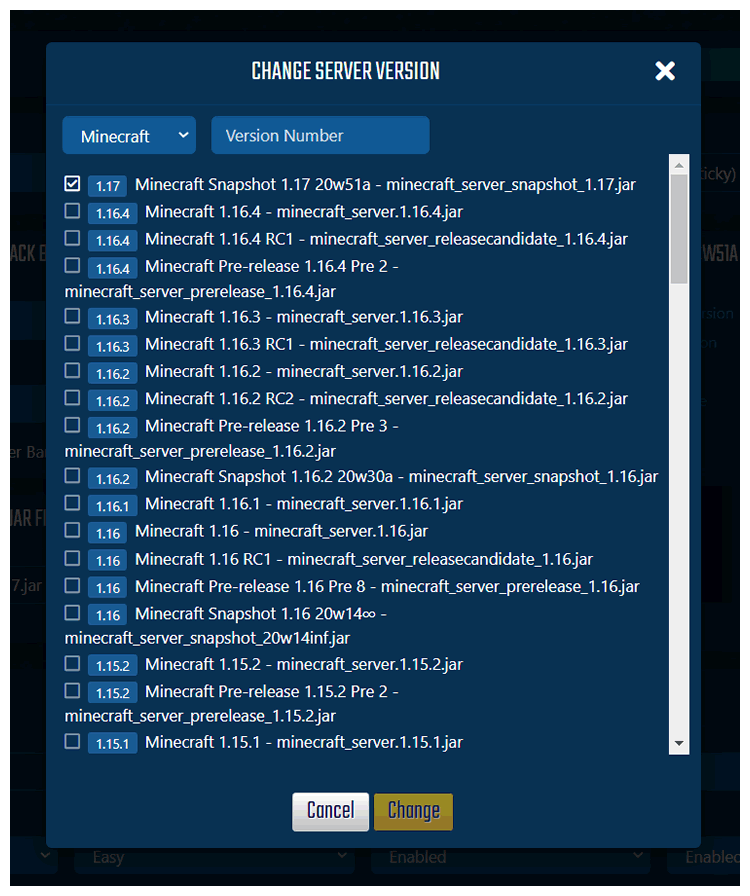
Search
Minecraft 1.17and select it from the list of versions.

-
Click
Changeto save. - Start your server
STICKY NOTE

If your world has any datapacks in it, they are likely to break and won't work. You will need to update these separately once the datapack author has released an update for it to work on 1.17
Recovering a Broken World
If your world breaks from updating your server, you will need to restore your server from the backup that you took before updating. This will set the server back to it's default state.
- Open a support ticket and our team will recover the world for you.
-
If you duplicated the world using the World Manager, you can use the World Manager to activate your world.
If you activate your backup world, you are potentially risking losing the backup, we would recommend duplicating it again, or using the backup feature built in to Multicraft instead.
Further Reading
StickyPiston Support
If you have questions about this guide or our Minecraft services, open a support ticket and our dedicated team will be in touch.
Open Support Ticket
 US Multicraft
 EU Multicraft
 Aus Multicraft