 US Multicraft
 EU Multicraft
 Aus Multicraft
This guide explains installing and configuring CraftBukkit/Spigot plugins on your Minecraft server using the Multicraft control panel. If you come across any problems during this process open a support ticket and we're happy to help.
You can also install plugins directly through your FTP connection with our alternate guide: Installing a Minecraft Plugin using FTP
Contents
- What is a Plugin
- Installing Plugins
- Locating and Editing Plugin Configurations
- Further Reading and External Links
What is a Plugin
For information on what a plugin is and how they work, read our article about what plugins are and how they work.
Adding a Plugin from the Plugin List in Multicraft
Installing a JAR file Plugin
- Log into Multicraft.
- Select the server you want to add a plugin to.
- Stop your server.
- Click on
Plugin Listin theFilessection of the navigation menu on the left.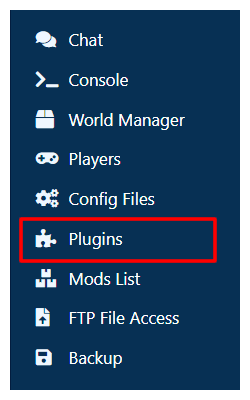
- At the top page, select type of server you are running in the
Sourcedropdown. By default, this isBukkit.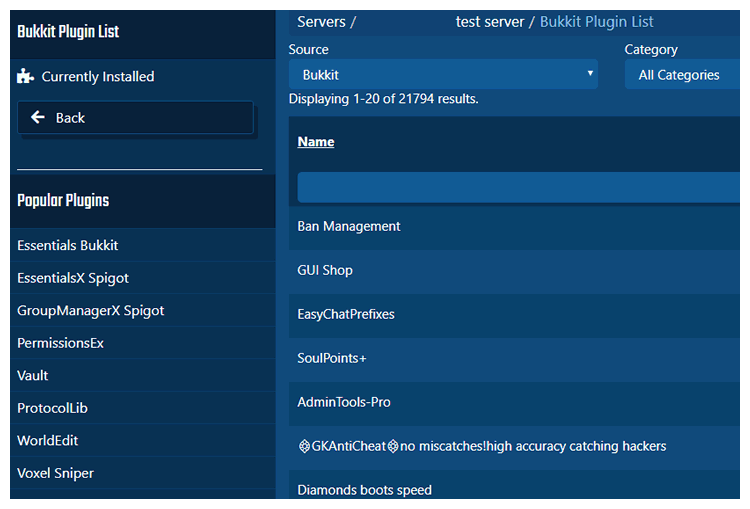
- Locate the plugin you wish to install in the list.
Note: You can also search for the plugin using the text entry boxes at the top of list. - Click the name of the plugin you would like to install.
- On the page, you may see a table of server versions and compatible plugin versions. Find a version of the plugin that is compatible with the Minecraft version your server is and select it in the version dropdown just below the table.
Example: If we wanted to install this plugin for Minecraft 1.9, we would need to use a plugin version between5.13.0and7.0.1. We always recommend using the latest compatible version of the plugin, so in this case we will install version 7.0.1 by choosing it from the dropdown menu below the table.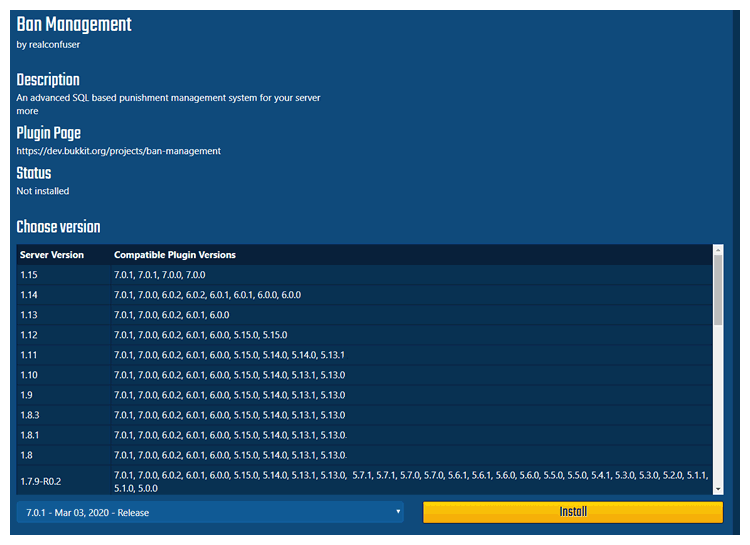
- Press the
Installbutton to the right of the plugin version dropdown to add the plugin to your server. - If successful the
Installbutton will change to aChange tobutton, and there will be two new buttons, aDisablebutton and aRemove. These buttons do the following:Change to: Changes the currently installed plugin version to the version currently selected in the version select dropdown.Disable: Keeps the plugin downloaded to the server, but adds the.disabledsuffix to make the plugin not get loaded by the server. (If the plugin is currently disabled, this button will be anEnablebutton instead.)Remove: This deletes the plugin from the server completely.
- The server will attempt to load the plugin the next time the server is started. You can confirm that it has loaded by running the
/pluginscommand in Minecraft, or by typingpluginsand sending that in the console in Multicraft. - Start your server.
Installing an Archive File Plugin
Some plugins need to install more than one file. In this case the files and their file structure are preserved within an archive file, typically in a .zip format. Multicraft is capable of extracting these archives to the plugins folder on your server.
Note: The archive you upload through Multicraft must be a zipped archive. Any other format will not work.
- Log into Multicraft.
- Select the server you want to add a plugin to.
- Stop your server.
- Log into the FTP system, more information on how to do this can be found in our guide on how to use FTP file access.
- Browse into the
pluginsfolder by clicking the folder name. - Upload the archive with the plugins in it. If you are using Multicraft, if you upload it under the Archives section, Multicraft will automatically unzip it for you. If you upload it via a third party client or under the Files side, you will need to manually unzip it.
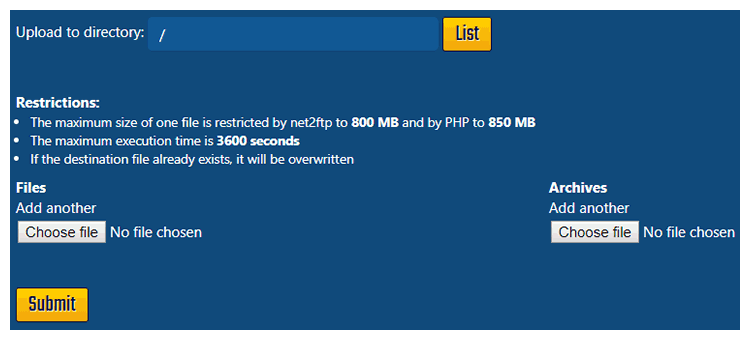
- If you uploaded it under Archives, you're done now. If you uploaded it as a file, click the
Backlink above theUpload to Directoryline and continue to the next step. - Select the archive with the check box on the left of the name then select
Unzipat the top right of the list to unzip everything from the archive.
- You should now see all the plugins that were in the pack in the folder are now in the
pluginsfolder.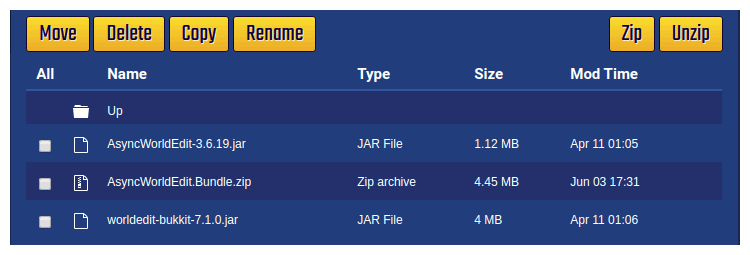
- Start your server.
Locating and Editing Config Files
For information on how to locate and edit plugin configuration files you can follow our guide: How To: Edit YAML Configuration Files for Bukkit and Spigot Plugins
Take care when editing these files, it's possible to make changes that prevent a plugin, or even the server itself, from loading. Take particular care when editing .yml or .yaml files, they have a structure that depends on line indents. Copy the text into a tool like Notepad++ or the Online YAML Parser to help you validate the file.
Further Reading and External Links
- Spigot Plugin List
- How To: FTP File Access
- How To: Edit YAML Configuration Files for Bukkit and Spigot Plugins
- Notepad++
- Online YAML Parser
StickyPiston Support
If you have questions about this guide or our Minecraft services, open a support ticket and our dedicated team will be in touch.
Open Support Ticket
