 US Multicraft
 EU Multicraft
 Aus Multicraft
There can be times when you don't want all the mods in your modpack to load on
the server. There are a variety of reasons for this but always be aware that
disabling certain mods may cause problems or crashes with the server.
If a crash occurs you can re-enable your mods following this short guide:
Enabling Disabled Mods
Disabling Mods
Before you begin to to make changes to your mods list, always make a
backup of the server with this guide:
How to Backup your Minecraft Server World.
To disable mods you will need to add the .disabled suffix to the
mod file.
Follow these steps:
- Login to your Multicraft control panel.
- Stop your server.
-
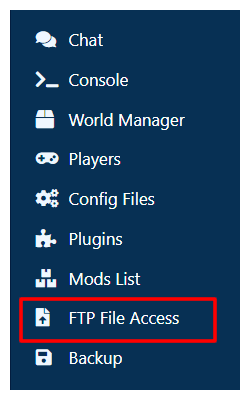
Click
FTP File Accessin the "Files" section of the left side navigation.
- Enter your FTP password.
- Click the
modsfolder in the server folder list. - Search down the list for the mods you would like to disable.
-
Click the checkboxes next to the mod(s) you would like to disable.
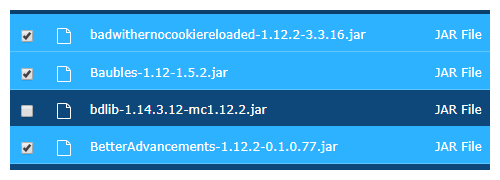
Note: The files for the mod(s) should end with.jar. - Click the
Renamebutton at the top of the page. -
In the
New Namefield add.disabledto the end of the file name for all the files you selected, then click submit.
Example:plugin.jarwould becomeplugin.jar.disabled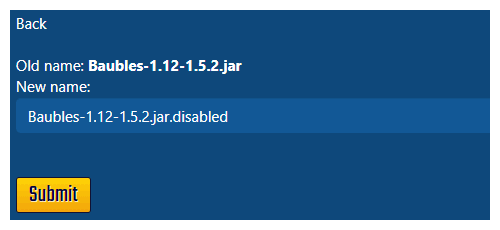
- This will now rename all the files and disable them.
- Exit your FTP connection.
- Start your server.
Don't forget that changes on the server will also need to be made on your client files (The ones on your PC) as well as any players PCs that are trying to connect to the server.
Further Reading & External Links
- How to Upload and Download Files with FTP
- How to Backup Your Minecraft World Folder
- How To Enable Disabled Mods
StickyPiston Support
Whether you own a server with StickyPiston or don't, we are always
happy to help with any and all issues you may be having. Open a
support ticket with our team and we will be in touch.
Open Support Ticket
